Develop cloud-native Java applications directly in OpenShift with Open Liberty and odo

True-to-production development is critical when you create cloud-native applications, and what better way to develop those applications than directly in the cloud! The Open Liberty devfile stack allows you to do just that by providing a simple yet robust Open Liberty development experience directly in a Kubernetes or OpenShift cluster. The devfile stack does the heavy lifting by allowing you to focus on your code as if it were running right on your laptop.
Check out the YouTube video for a link:"quick demo:
OpenShift Do
OpenShift Do (odo) is the mechanism that’s used to drive the Open Liberty stack. It’s a straightforward CLI tool that you can use to create stack projects and interact directly with a Kubernetes or OpenShift cluster. Unlike kubectl and oc, odo abstracts away the complexity of the underlying infrastructure and helps developers focus on their applications.
Try it out
After you install odo, you can use the Open Liberty stack to either create a new Open Liberty starter application or initialize an existing application as a stack project. In this blog post, we’ll use the devfile-stack-intro project as a starting point:
$ git clone -b blog-demo [email protected]:OpenLiberty/devfile-stack-intro.git && \
  cd devfile-stack-intro
This application is a basic JAX-RS sample that uses Maven, Open Liberty, and MicroProfile.
Log in to your OpenShift cluster and create an odo component:
$ odo create java-openliberty my-ol-componentYou will notice that a devfile.yaml file has been downloaded in the project root from the default devfile registry. This devfile is the brains behind the Open Liberty stack and outlines how the application is built, run, and deployed using the stack’s development image.
The devfile-stack-intro application is now initialized with odo and ready to deploy:
$ odo pushJust like that, the application is pushed to your cluster. There’s no need to build an image, create a deployment, or run any custom commands. The stack and odo do everything behind the scenes. You can check the output to make sure that your application is up and ready for use:
$ odo logTo access the application, the Open Liberty stack creates a default URL for your deployment named ep1. You can find that URL in the URL list:
$ odo url list
Found the following URLs for component my-ol-component
NAME STATE URL PORT SECURE KIND
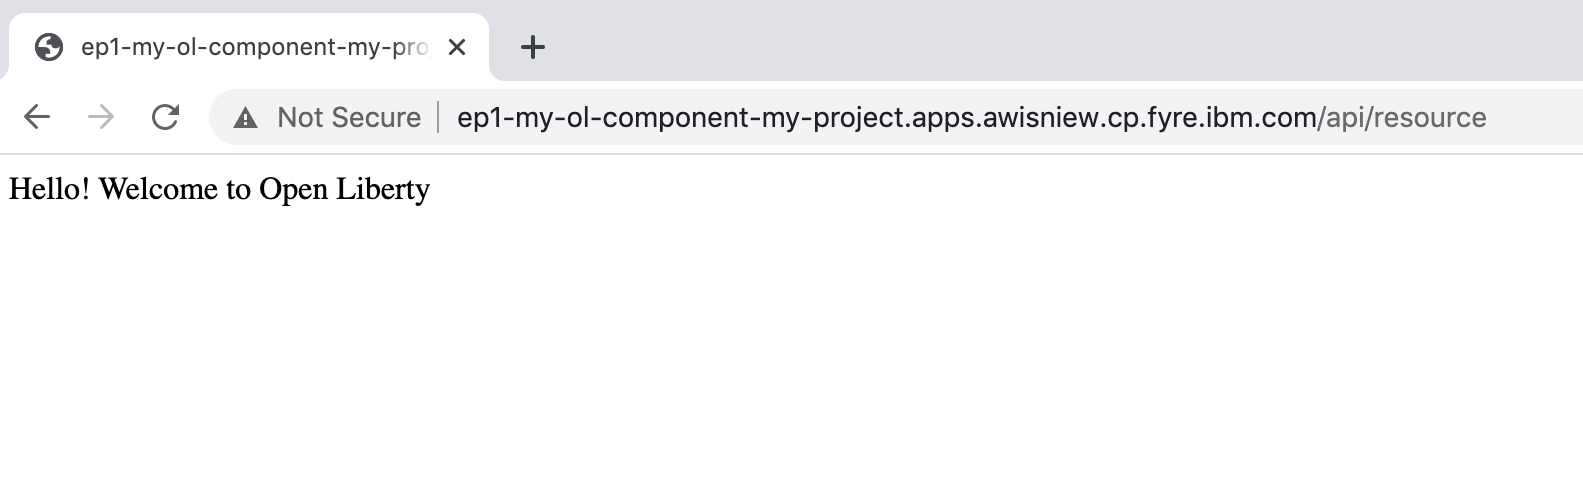
ep1 Pushed http://ep1-my-ol-component-my-project.apps.awisniew.cp.fyre.ibm.com 9080 false routeOpen a browser to this URL and append /api/resource to the end of the URL for the REST endpoint, for example, http://ep1-my-ol-component-my-project.apps.awisniew.cp.fyre.ibm.com/api/resource. You should see the following screen:
If you’re deploying to generic Kubernetes, you might need to create a URL by using a configured Ingress domain, for example, odo url create --host <my-ingress-domain>, and then push your changes again.
Start coding!
Not only is the application running in OpenShift, it is also running in dev mode so it’s ready to pick up any changes that you make. Each time you make a change, you can either re-issue the odo push command to sync your local changes with your remote cluster, or odo can watch for changes automatically:
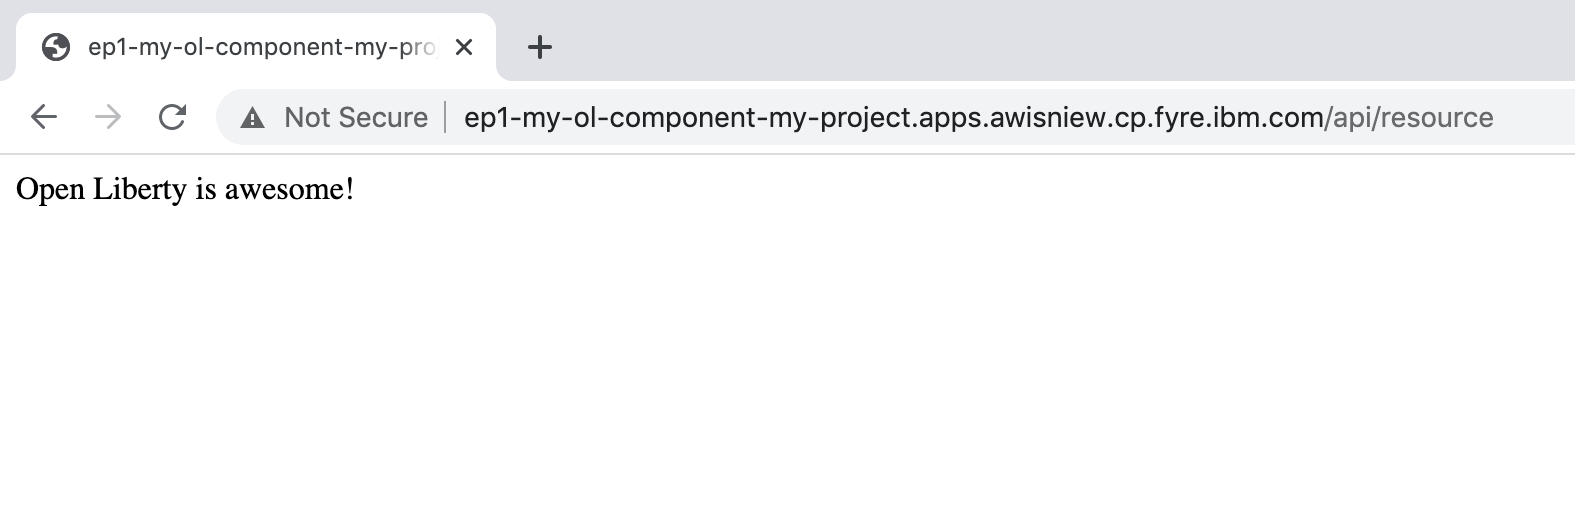
$ odo watchNow, let’s make a change to the REST API. Open src/main/java/dev/odo/sample/StarterResource and change the getRequest() String response to "Open Liberty is awesome!"
Refresh your browser. The application that’s running in OpenShift is automatically updated!
Learn more
To learn more about odo, go to https://odo.dev. For more details about the Open Liberty stack, go to https://github.com/OpenLiberty/devfile-stack.


