A solution to configuration drift - deploying Open Liberty with GitOps


Many organizations are struggling with configuration drift, and GitOps provides a robust solution. If you’re unfamiliar with what configuration drift is or how GitOps can help mitigate it, check out part 1 of this two-part series: Configuration drift: Why it’s bad and how to solve it with GitOps and ArgoCD
In this post, part 2 of this series, we demonstrate how to practically apply the solutions we introduced in part 1. We walk through the deployment of an Open Liberty application to a Kubernetes cluster by using a continuous deployment approach with GitOps and ArgoCD. ArgoCD is a leading GitOps tool that automates application deployment and ensures configuration consistency, effectively preventing configuration drift.
Preparing your cluster
In this post, we assume you have some form of Kubernetes cluster that you can access by using the kubectl CLI or oc CLI if on Red Hat OpenShift.
Simplifying deployment with the Open Liberty Operator
The Open Liberty Operator streamlines the deployment and management of Open Liberty applications on Kubernetes. Instead of manually crafting Kubernetes resources like services, deployments, and routes, the operator lets us define only a few application details to automatically generate the required Kubernetes resources - saving us time and effort. Furthermore, it simplifies Day 2 operations such as traces and heap memory dumps. For more on the Open Liberty Operator, check out the documentation.
To get these benefits, we use the Open Liberty Operator to deploy an application with the following commands, which install the operator with its default configuration (watching all namespaces):
git clone https://github.com/OpenLiberty/open-liberty-operator.git
kubectl create namespace open-liberty
kubectl apply --server-side -k open-liberty-operator/deploy/releases/1.3.1/kustomize/overlays/watch-all-namespaces
For a more detailed tutorial on using the Open Liberty Operator, see our interactive guide: Deploying a microservice to Kubernetes using Open Liberty Operator.
Set up ArgoCD for effective GitOps and continuous deployment
ArgoCD follows a GitOps pattern of using Git repositories as the source of truth to define the application state, which we will use to deploy and monitor our Open Liberty configuration repository. ArgoCD helps us identify any drift that occurs between the current cluster state and the desired state in the configuration repository. Using the ArgoCD user interface (UI) is a great way to get started, allowing us to create our application and identify configuration drift in a visual way.
-
Run the following commands from the Quickstart section of the ArgoCD docs to create a namespace that is called
argocdand install ArgoCD by applying manifests to that namespace.kubectl create namespace argocd kubectl apply -n argocd -f https://raw.githubusercontent.com/argoproj/argo-cd/stable/manifests/install.yaml -
Run the following command to get the default
adminpassword to access the ArgoCD UI:kubectl get secret argocd-initial-admin-secret -n argocd -o jsonpath='{.data.password}' | base64 -dCopy the password so you can enter it to log in to the ArgoCD UI.
-
To access the ArgoCD UI:
-
If you are on Red Hat OpenShift with ingress configured, go to the route of the
argocd-server. -
Alternatively, you can access the UI with port forwarding by running the following command:
kubectl port-forward svc/argocd-server -n argocd 8080:443and visiting
https://localhost:8080/.
-
-
Log in with the default
adminusername and the password that you retrieved by runningkubectl get secret.
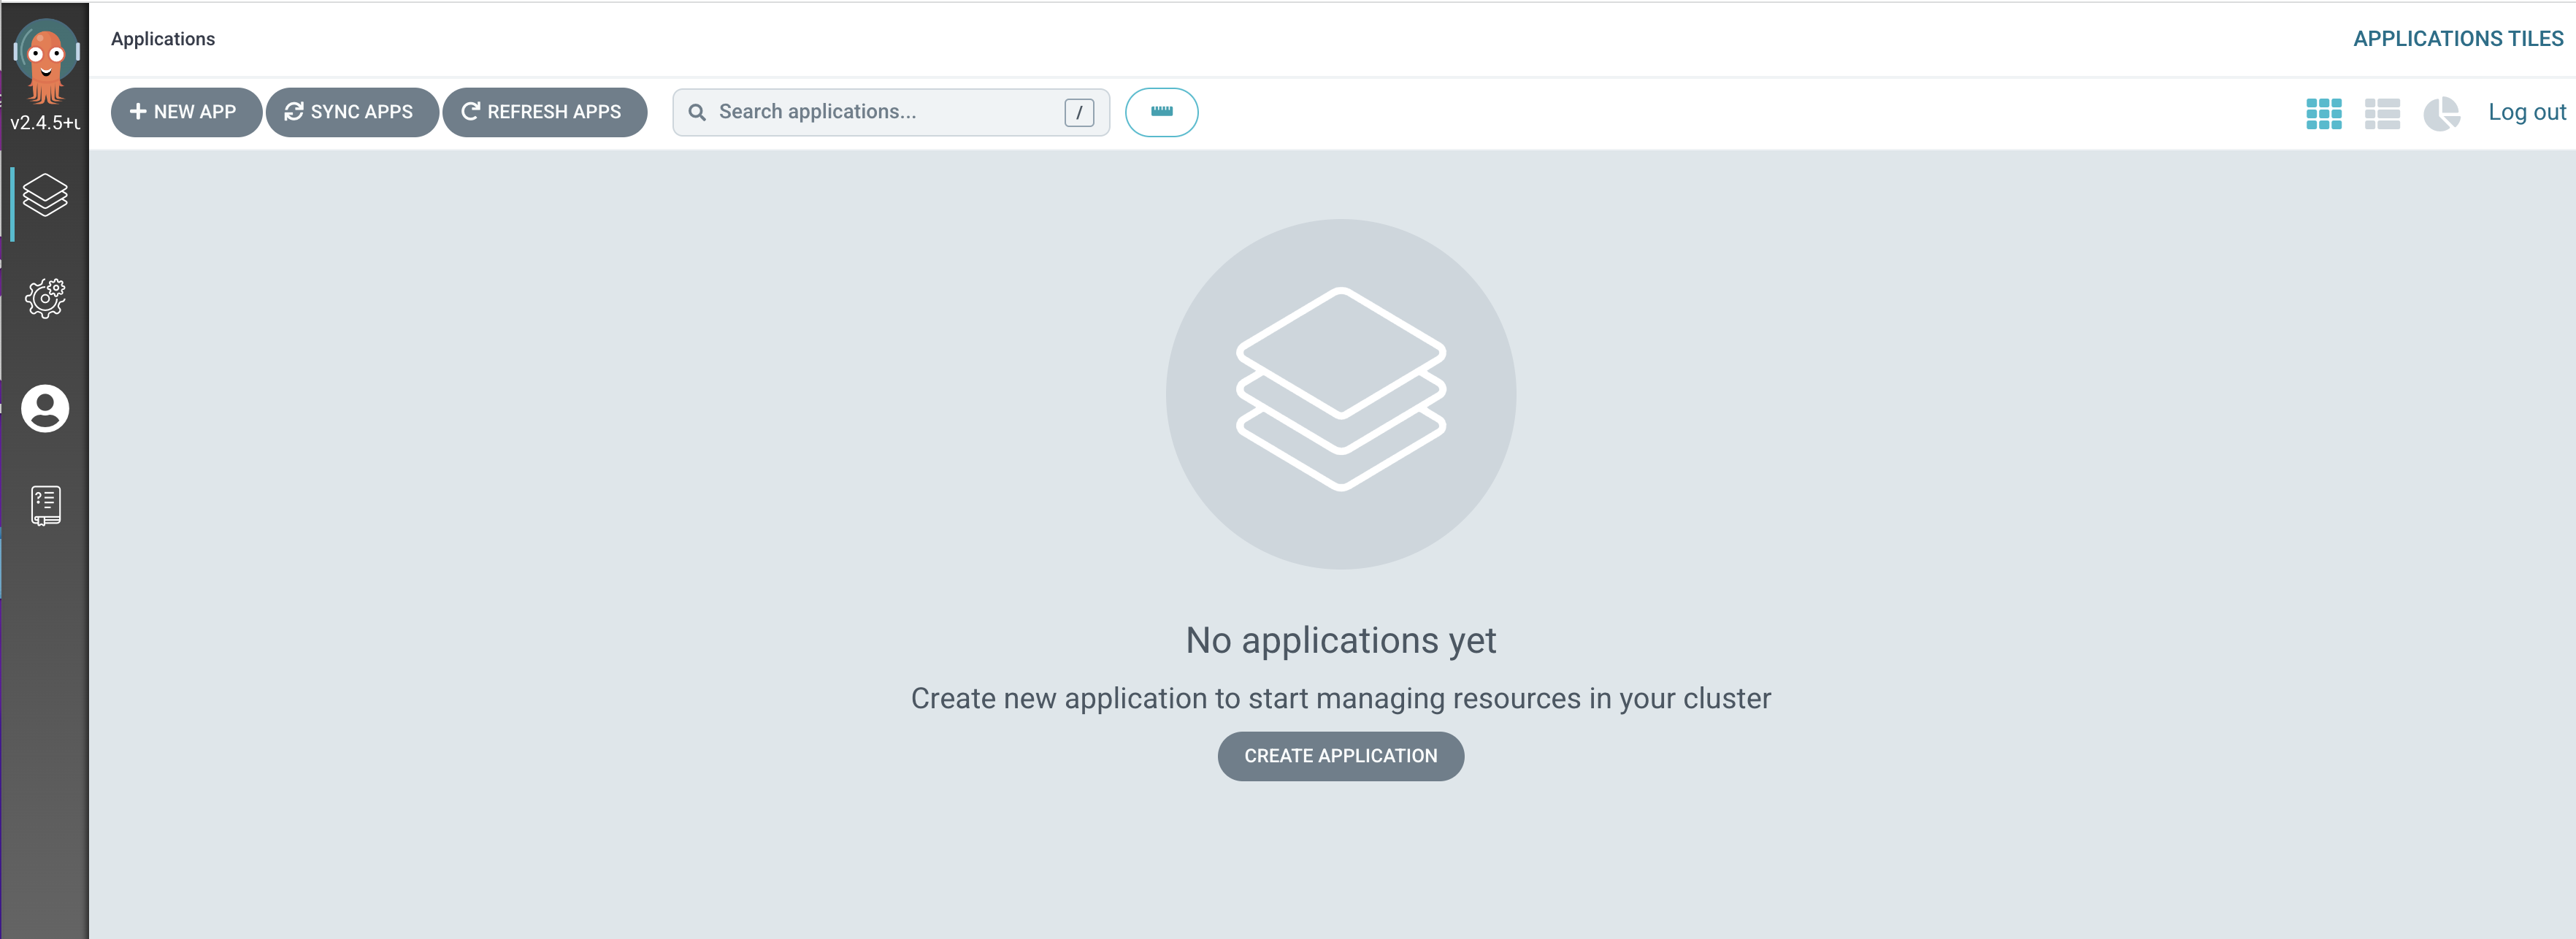
Once logged in, you’ll see the ArgoCD landing page, similar to the following screenshot:
Setting up a GitOps repository for your application
Now that you’ve installed ArgoCD and accessed its console, the next step is to set up a GitHub repository for ArgoCD to synchronize with. In our example, we created a deployment directory in the application code repo that we point ArgoCD to for deployment.
For this particular example, because it’s just a small demo application, we put the deployment configuration in the same repository as the application code. However, in general, it’s better to separate the deployment configuration into a separate repository from the application code. This strategy aligns with recommended best practices to maintain separation between configuration repositories and code repositories. Keeping these separate ensures that infrastructure changes are decoupled from application changes, allowing for more granular control, better audit trails, and reduced risk of unintended side-effects. For more information, see ArgoCD’s documentation on best practices.
For the purposes of this post, we’ll use the Daytrader7 sample application. This application is built around the concept of an online stock trading system, and the Daytrader7 README provides a comprehensive overview. In this example, we have a deploy directory within our existing repository to house the deployment configuration. This directory contains the manifests for full application deployment and annotations that tell ArgoCD which order they should be deployed in.
To begin, fork this repository: https://github.com/WASdev/sample.daytrader7. Use your forked repository when configuring ArgoCD in the following steps.
In this example, we have a pre-built container image for the DayTrader sample application pushed to Docker Hub that is used in the deploy/daytrader7-deploy.yaml deployment file. For more information on how to containerize your Open Liberty application, check out our interactive guide: Using Docker containers to develop microservices.
Deploying a Java application with GitOps and ArgoCD
Now that the Git repository is forked and ready for deployment, it’s time to configure ArgoCD to deploy the application.
-
Go to the ArgoCD console dashboard.
-
Click New App in the console.
This button opens a window where you give ArgoCD the details on the application you want to deploy, as shown in the following image.
-
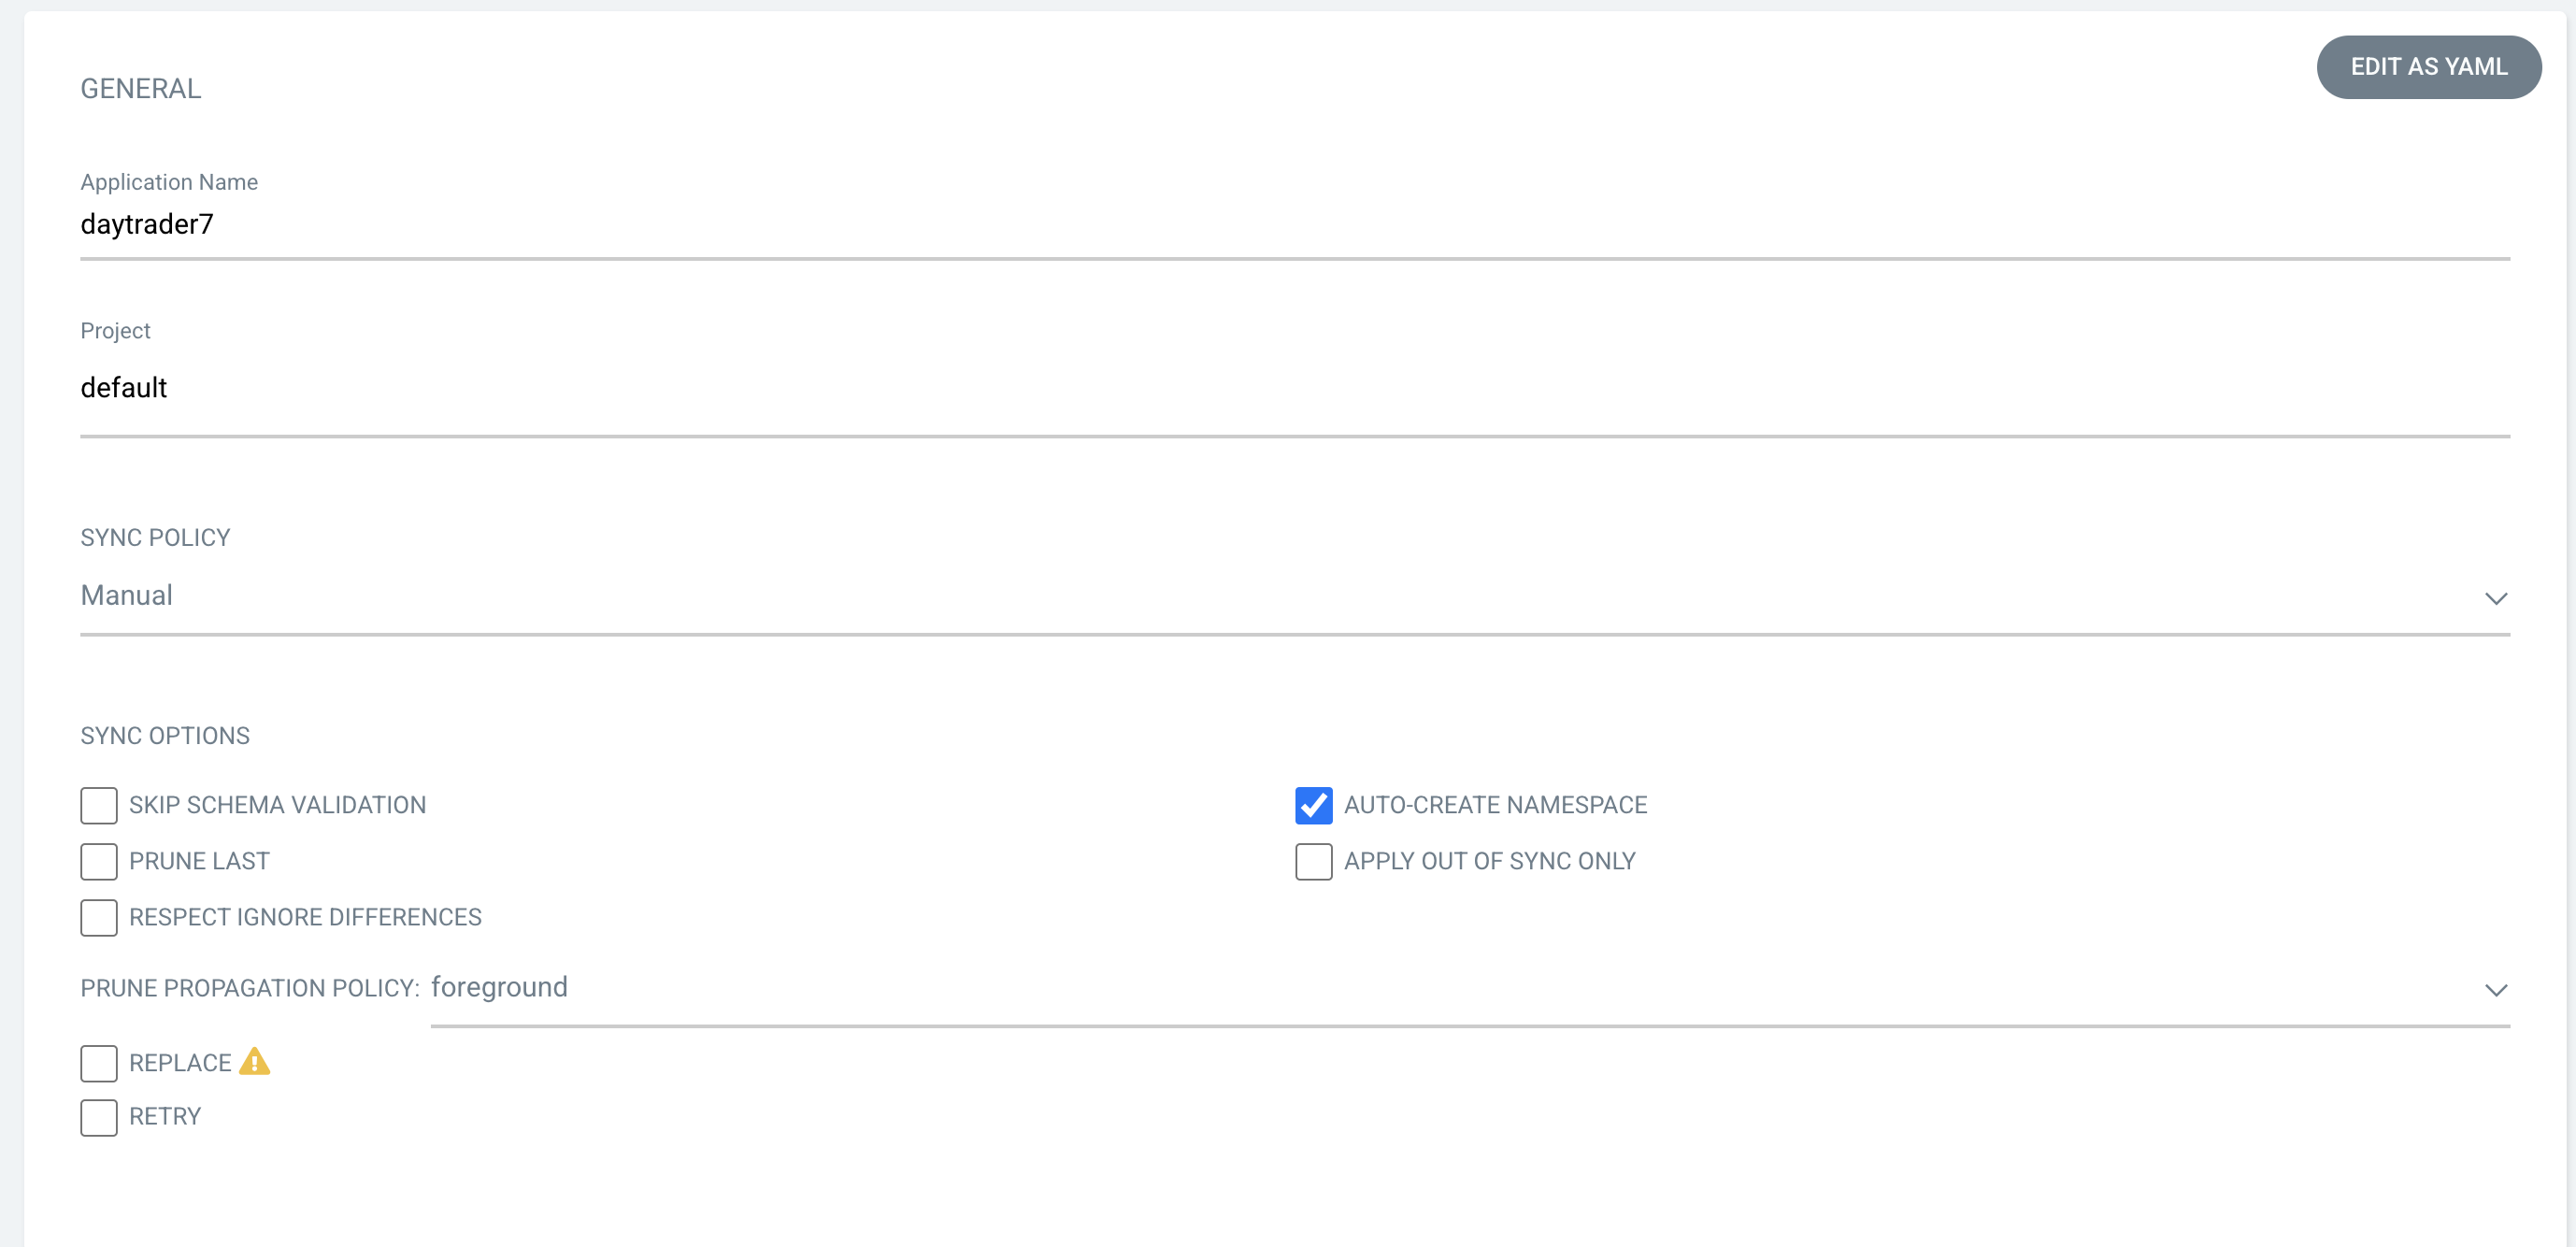
For our demo application, enter the following values:
Application Name: daytrader7
Project: Leave as "Default". This setting groups applications together for large-scale deployments, which is not needed in our case.
SYNC POLICY: Manual. This configuration option determines whether we want ArgoCD to automatically correct configuration drift or wait for us to manually tell it to.
SYNC OPTIONS: Select the Auto-Create Namespace box, which creates the namespace if it doesn’t already exist.
-
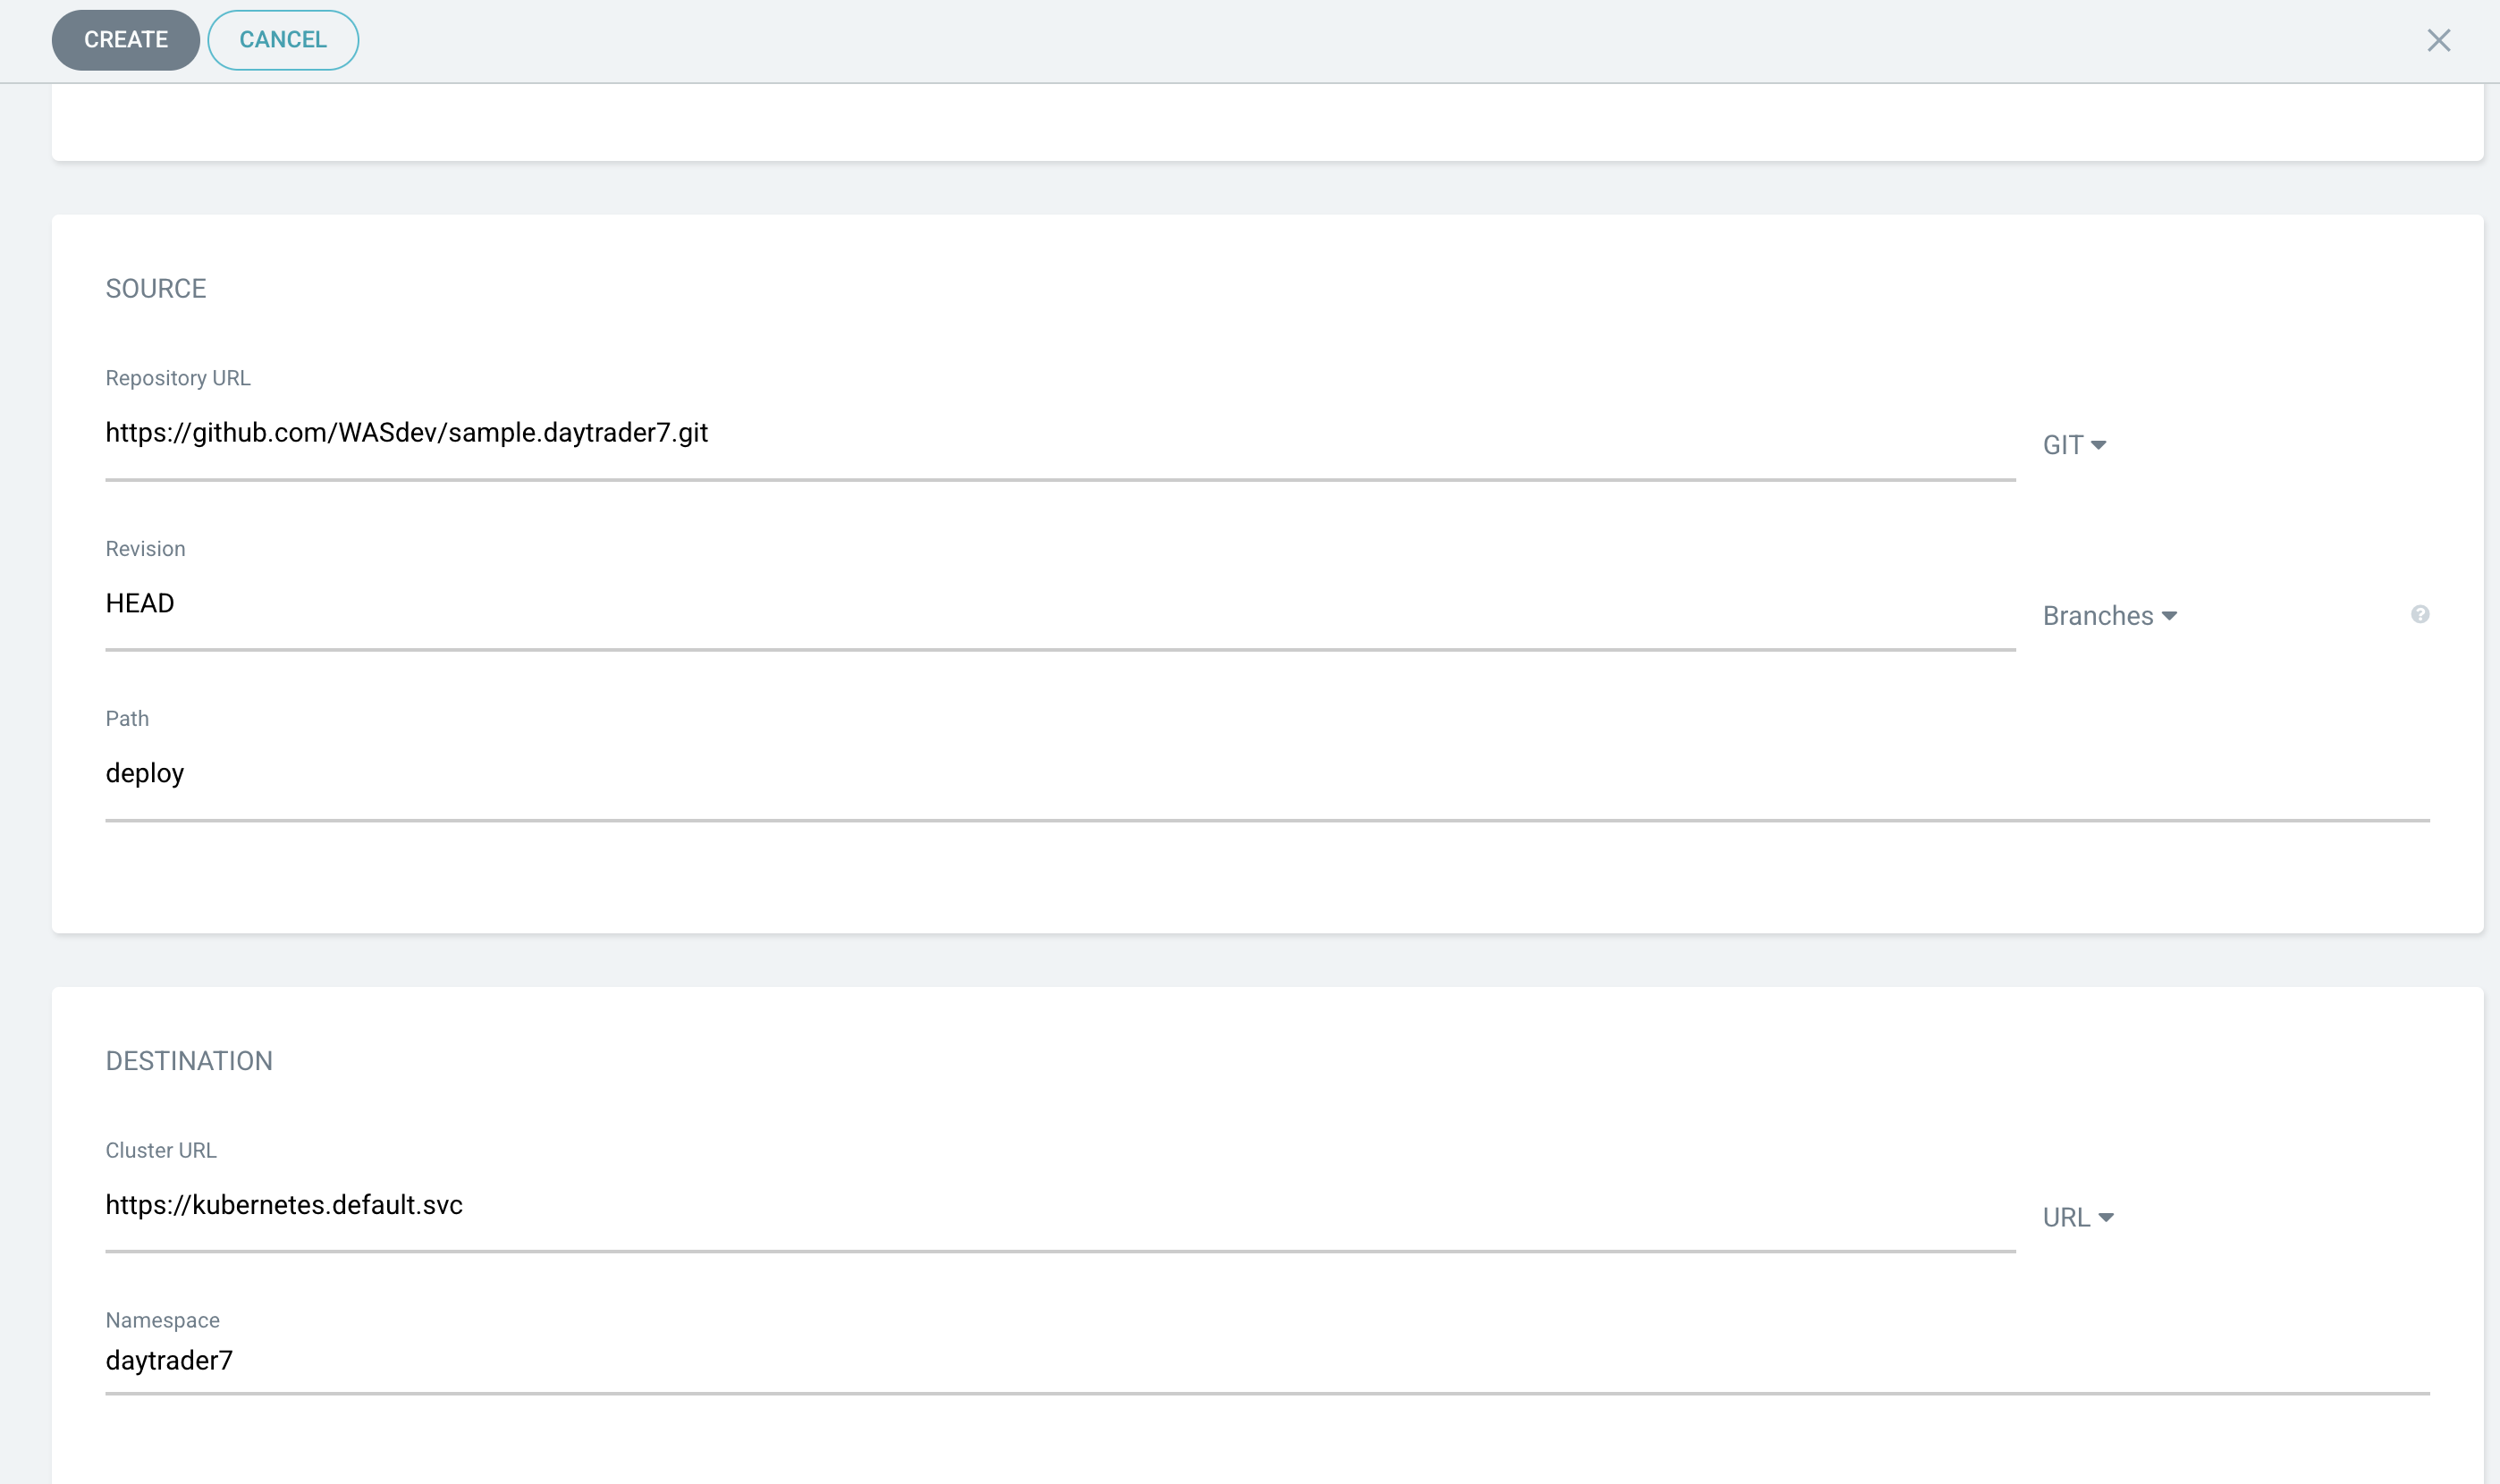
Scroll down to the configuration section labeled SOURCE, as shown in the following image.
-
Change the Repository URL to your newly forked repo. This tells ArgoCD what Git repository has the configuration for the application you want to deploy.
-
Change the Path to the path in the git repo where ArgoCD is looking for deployment files to deploy.
-
Set the Cluster URL.
In this example, we set it to
https://kubernetes.default.svc, which is the local cluster URL. -
Set the Namespace.
In our case, this is
daytrader7, which will be created because we selected the Auto-Create Namespace option. -
After verifying these options, click Create.
This creates an "Application" resource that ArgoCD uses to watch the repository we gave it.
Manually Syncing your Application with the Repository
Since we chose a manual sync policy, we must sync the application manually for ArgoCD to deploy it. On the main page of the ArgoCD console, you should see a new tile that looks like this:
Click the Sync button. Then, on the window that appears, click Sync again. To monitor the progress of this application sync, you can click the daytrader7 tile. Over the course of a few minutes, you should see resources being created and the app dashboard should look like this:
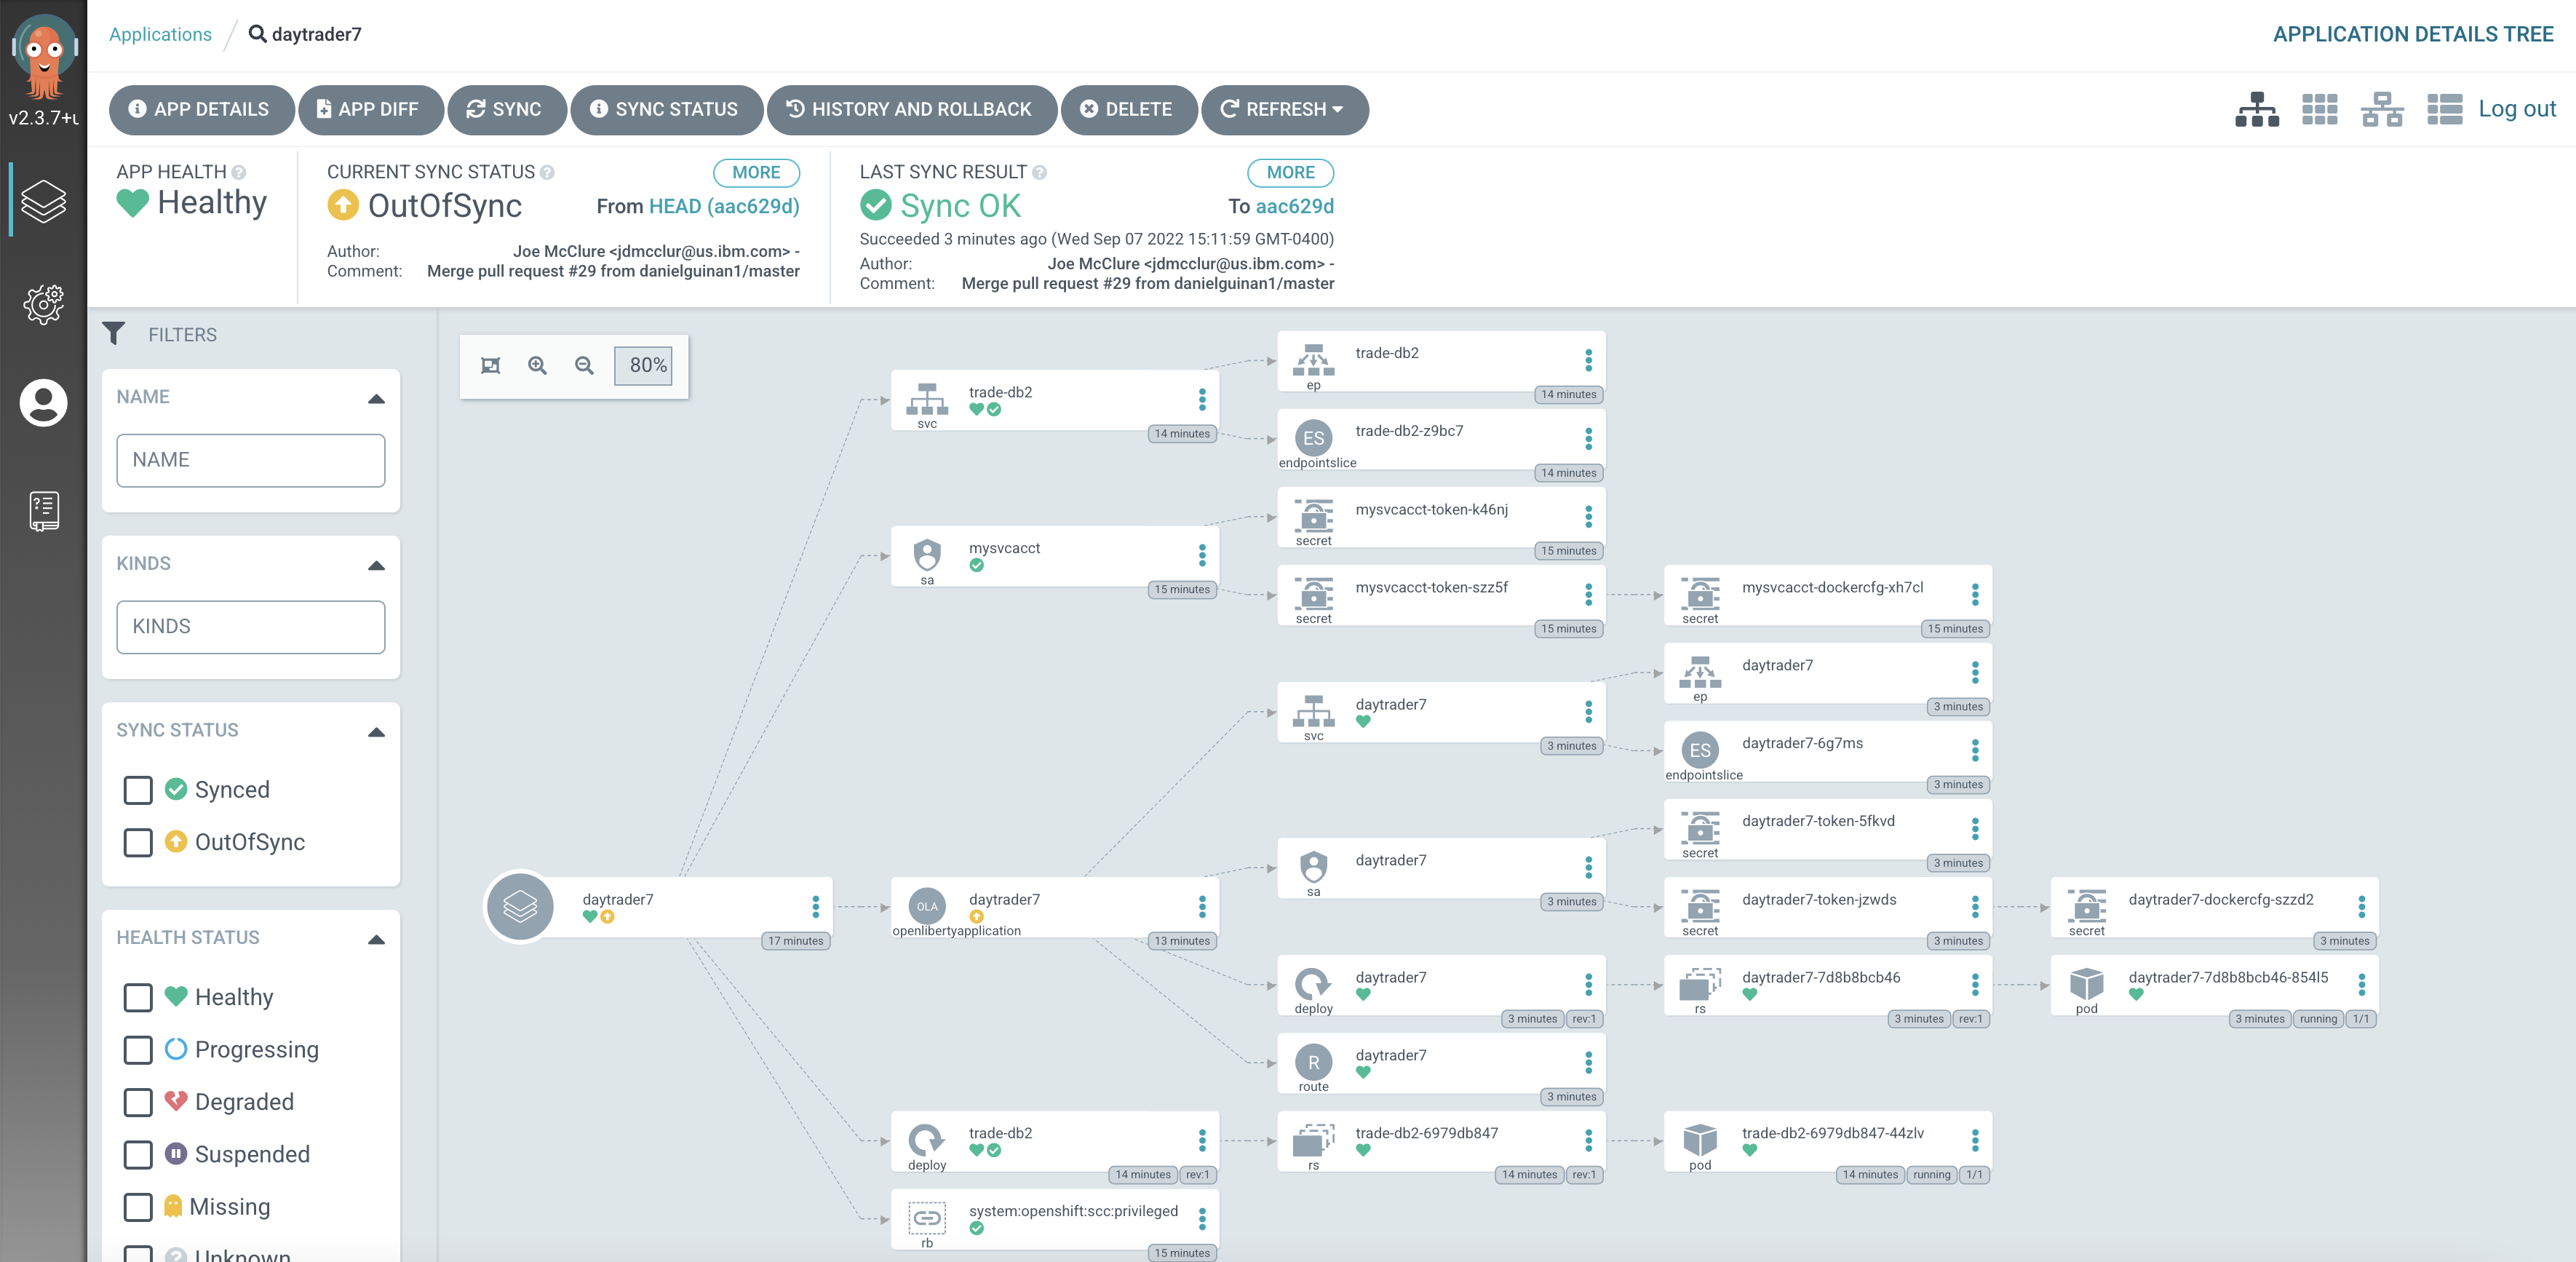
This diagram shows the many Kubernetes resources that are created for the application, such as the deployment, pod, and service. We can also monitor the health of each of these resources and verify that they were created properly.
Now that the application is deployed and all the resources are created we need to make sure it is exposed externally. This sample sets spec.expose to true, which automatically creates an external route on Red Hat OpenShift. If you are on Kubernetes, you need to either configure a load balancer or an Ingress controller for the application.
On Red Hat OpenShift, find the URL by running the following command:
oc get routes –n daytrader7Alternatively, if you are on Kubernetes with Ingress configured, run the following command:
kubectl get ingress -n daytrader7Then, paste the URL in a browser to access the Daytrader login page.
And there we go! We have fully deployed our application with GitOps!

How GitOps solves configuration drift
Now that we have deployed the app, let’s show a scenario where configuration drift occurs and how we can easily correct it.
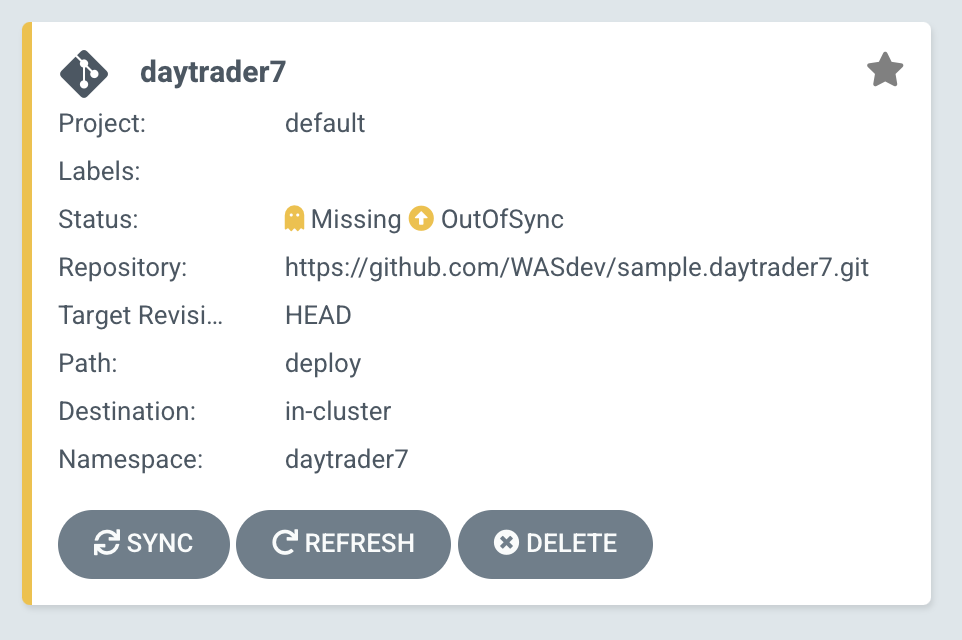
Let’s say a developer changes the memory settings in the configuration file for a quick test. To represent this, change the memory request that is found at spec.resources.requests.memory from 1024Mi to 2048Mi. To make this change, you can either use the console or run the following Kubernetes CLI command:
kubectl edit OpenLibertyApplication -n daytrader7 daytrader7In a few moments the argo console should show it is out of sync:
"Out of Sync" means that some form of configuration drift occurred in the application. We can refer to the application in the ArgoCD UI to see exactly where it occurred.
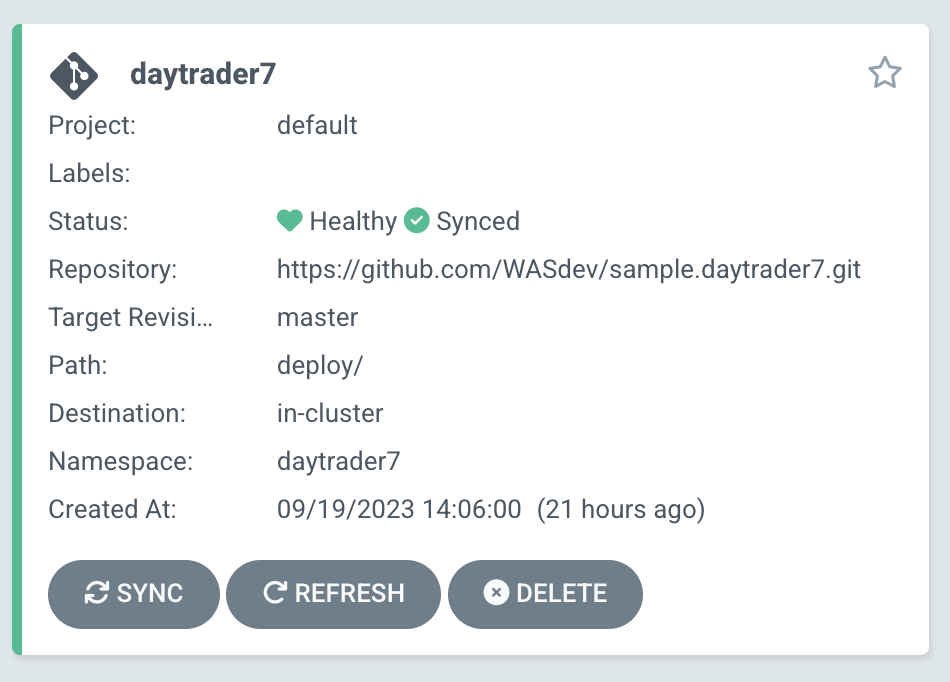
Since we set the sync policy to manual, we must manually tell ArgoCD to correct the configuration drift. Click the Sync button to return the configuration to match what is in Git.
Results
In this blog post, we explored the seamless deployment of an Open Liberty application through the GitOps methodology, highlighting its effectiveness in mitigating configuration drift. Whether you’re seeking to refine your deployment strategy or embark on a fresh project for an Open Liberty application, we encourage experimenting with GitOps. You can easily extend this approach to automate the deployment of other application dependencies, such as databases.
And for those looking to create or update Open Liberty applications, the Open Liberty guides offer helpful insights and steps.


